Tile Grout Tips: 3 Things You Need to Know About Finalizing Your New Tile
You found a tile you adore for your new kitchen or bath remodel project. Next, you need to select a grout to go with it. Here are 3 tile grout tips that you should know as you look to finalize your tile installation.
Sometimes, homeowners find it more challenging to match grout color than pick out the actual tile. This blog will help you make that choice to accent your tile backsplash or floor perfectly.
What is Grout?
Grout is a mix of cement, water, color pigment and (sometimes) sand that is used as a filler for the spacer joints in between tiles after the tiles you install have set.
This is an essential and integral part of a tile installation. It keeps moisture out of the tile underlayment surface, helps keep tile lines straight and prevents tiles from shifting, rubbing against one another and cracking.
Choosing the right grout type and color has a lasting impact on your final tile installation and overall home remodel project. Done incorrectly, you may end up with grout and tile that deteriorate over time, becoming an eyesore instead of a focal point. Done right, you will have a beautiful installation that looks and performs perfectly for many years to come.
Tip 1: How to Choose Grout Type
The type of grout you choose depends on the type of tile you have and the size of the spacing between each tile (joint).
#1. Sanded Grout
Sanded grout is best for non-glossy, non-marble surfaces with joints between 1/8” to 1 ½”.
Held together by fine particles of sand, sanded grout holds up for floors and walls and reduces grout spacing shrinkage.
It’s the most common type of grout used, especially for interior flooring installations. This is because it is more durable (and less expensive) than its alternative—(unsanded grout)—and can handle foot traffic.
However, sand is porous, which means sanded grout will absorb any liquid. After tile installation and grout coverage, clean up the grout as necessary and apply a coat of sealer, especially in wet areas like the shower.
#2. Unsanded Grout
Unsanded grout is necessary for glass, marble, metal or glossy tile surfaces with smaller joints, between 1/16” to 1/8”. It’s best for thin grout lines and delicate, precise tile surfaces.
Unsanded grout costs more than sanded because polymers are added to form content. Sealing is usually recommended for unsanded grout also due to porosity—especially in wet areas.
#3. Bostik Hydroment® Vivid™
Beyond the two sanded versus unsanded grout categories, there have been innovations in grout formulation that you may also choose from depending on the application.
Hydroment® Vivid™ from Bostik is a rapid curing, premium-grade, stain-resistant cementitious grout, offering consistent color technology with enhanced stain and efflorescence protection.
Vivid™ works well for all glossy or matte tiles with joints between 1/16” to ½”.
Cost is comparable to other alternatives but may be slightly more than sanded grout. However, the cost is minor and well worth the peace of mind to remain fresh looking.
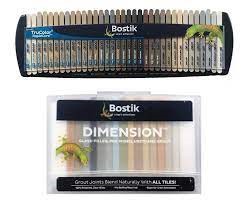
#4. Bostik Trucolor® Rapidcure™
There are also grouts specific for submerged applications (like pools), including Bostik Trucolor® Rapidcure™. A water-based, premium grout, Rapidcure™ offers color accuracy, water resistance, stain protection and crack protection—and it never needs to be sealed.
Tip 2: How to Pick the Right Grout Shade
The shade of your tile greatly impacts the finished product. You generally have two options: Monochromatic and accenting. It all depends on the look and feel you desire of your final design. Monochromatic choices blend with the color of the tile for a low contrast impact. Most grouts are not an exact match to the tile color but can be very close.
When you accent the grout with your tile, the tile’s pattern and color pops. This can be accomplished with a dramatic contrast of opposite tones, such as a white tile with grey grout.
Tip 3: How to Maintain Tile Grout
For easier maintenance, sealers are available to protect tile and grout. Here are some general tile grout tips when it comes to maintenance:
- Additives can actually be mixed into the grout batter to seal the grout.
- Topical sealers can be used if you want to seal a newly installed grout. Usually, it lasts up to 15 years or better. We recommend Miracle brand 511 Sealer.
- Using a grout that is already stain resistant is available (no additive mixture needed) such as Vivid from Bostik.
- To finish the tile installation job professionally, caulk is always recommended—and it comes in matching grout colors.
- Never clean with acidic products such as bleach or bleaching products, which will have negative lasting results.
Conclusion
If you like a larger tile design on walls or floors, you’ll like this trend: larger tiles with less grout lines. Tiles vary from 1’ to 2’ to panels as big as 5’ x 10’ in ¼” or ½” thickness.
There are a lot of options when it comes to not only selecting your tile but also matching it with the right grout. We hope these tile grout tips helped. Still have questions? You can always check-in at Eastern Surfaces and speak to the tile specialist for additional information.